pythonのレトロゲーライブラリ「pyxel」で、「四角をキーボード操作で移動するもの」を作りました!
ゲーム作成の1歩として、「キャラクター操作」を行えるようになるためのプログラムです!
作ったもの
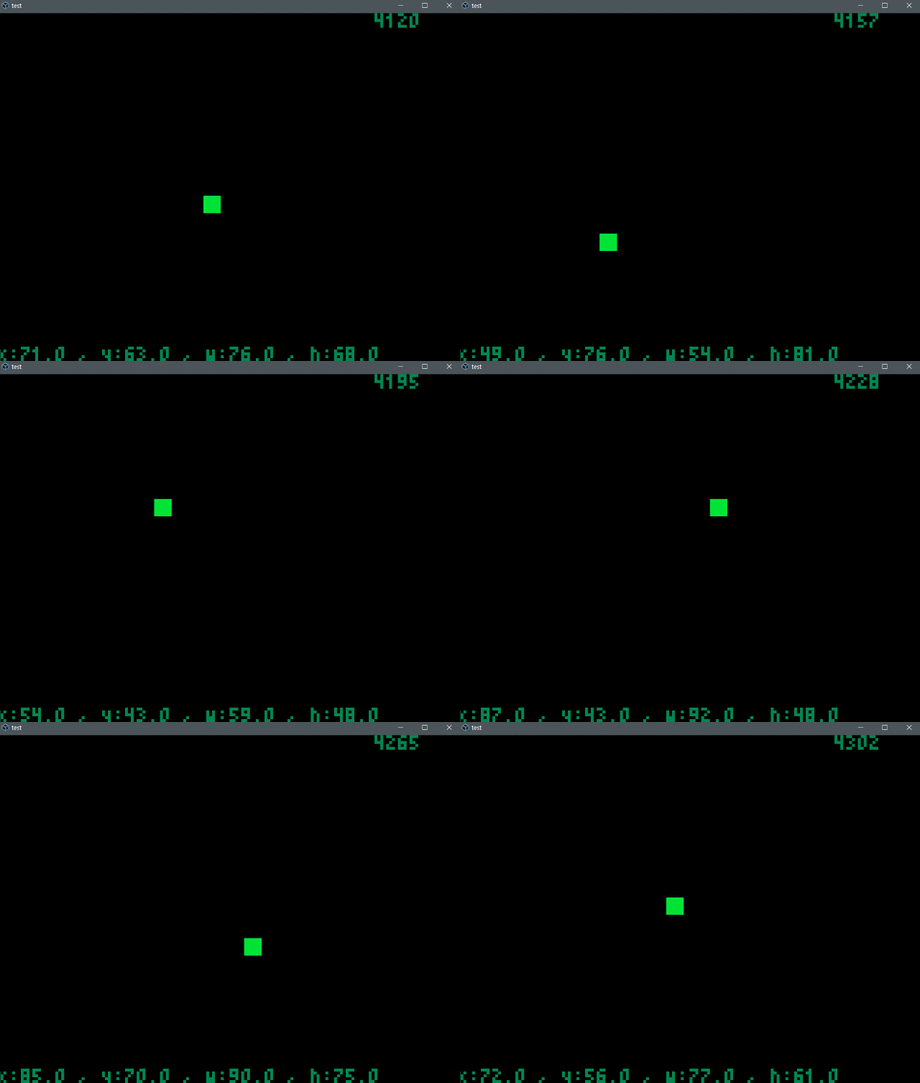
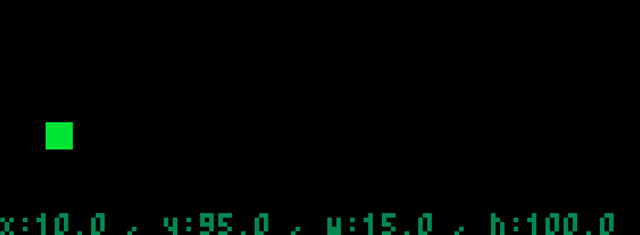
適当な四角を描画して、キーボード入力で上下左右に動くものを作りました。

WASDキーで、上下左右に動きます。
ほんものはもっとスムーズに動きます!
ソース全文
ソース全体が見たい方はコチラ[表示]をクリック→
import pyxel

class Position:
    def __init__(self, x, y, w, h):
        self.x = x
        self.y = y
        # w, hにセットするポジション
        self.w = x + w
        self.h = y + h
        # 実際のw, h
        self.wSize = w
        self.hSize = h
    def moveUp(self, amount):
        self.y -= amount
        self.h -= amount
    def moveDown(self, amount):
        self.y += amount
        self.h += amount
    def moveRight(self, amount):
        self.x += amount
        self.w += amount
    def moveLeft(self, amount):
        self.x -= amount
        self.w -= amount
    def status(self):
        return "x:{} , y:{} , w:{} , h:{} ".format \
                (self.x, self.y, self.w, self.h)

class App:
    def __init__(self):
        pyxel.init(160, 120, caption="test")

        # オブジェクトの初期化
        x = pyxel.width / 2
        y = pyxel.height / 2
        self.position = Position(x, y, 5, 5)

        # アプリの開始
        pyxel.run(self.update, self.draw) # update, drawのコールバックを設定

    # 周期ごとに実行する処理
    def update(self):
        if pyxel.btnp(pyxel.KEY_SPACE):
            pass # charactor jumping
        # elif pyxel.btnp(pyxel.KEY_A):
        elif pyxel.btnp(pyxel.KEY_A, 1, 1):
            self.position.moveLeft(1)
        elif pyxel.btnp(pyxel.KEY_D, 1, 1):
            self.position.moveRight(1)
        elif pyxel.btnp(pyxel.KEY_W, 1, 1):
            self.position.moveUp(1)
        elif pyxel.btnp(pyxel.KEY_S, 1, 1):
            self.position.moveDown(1)
        elif pyxel.btnp(pyxel.KEY_Q):
            pyxel.quit()

    # 描画 ここに処理系は置かないものと思われる
    def draw(self):
        pyxel.cls(0) # 画面をcolでクリア
        pyxel.text(pyxel.width - 30, 0, str(pyxel.frame_count), 3)
        pyxel.text(0, pyxel.height - 5, self.position.status(), 3)

        pyxel.rect(self.position.x, self.position.y, self.position.w, self.position.h, 11)

if __name__ == "__main__":
    App()
位置を管理するやつ
位置を管理するクラスを作りました。
class Position:
    def __init__(self, x, y, w, h):
        self.x = x
        self.y = y
        # w, hにセットするポジション
        self.w = x + w
        self.h = y + h
        # 実際のw, h
        self.wSize = w
        self.hSize = h
    def moveUp(self, amount):
        self.y -= amount
        self.h -= amount
    def moveDown(self, amount):
        self.y += amount
        self.h += amount
    def moveRight(self, amount):
        self.x += amount
        self.w += amount
    def moveLeft(self, amount):
        self.x -= amount
        self.w -= amount
    def status(self):
        return "x:{} , y:{} , w:{} , h:{} ".format \
                (self.x, self.y, self.w, self.h)
メンバ変数
メンバ変数は
- 「x, y」が左上の座標
- 「w, h」が右下の座標
- 「wSize, hSize」が幅と高さのサイズ
です。
座標を移動する関数
moveXX()で座標を上下左右に簡単に操作できるようにしてみました。
例えば「上に5px移動したい」というときは
position.moveUP(5)
のようにすると座標を変更してくれます。
四角の描画は、サイズ指定でなく、終端座標の指定なので、関数化した方が楽ちん!
デバッグ表示用関数
status()でデバッグ表示用のテキストを取得できます。
- status()で文字列取得
- 「pyxel.text()」で表示
とすれば、画面上に座標情報を表示することもできます。

もちろんデバッグ表示やログ出力でもOK!
初期化
初期化処理では、テンプレにあるinit()とrun()を除くと、オブジェクトの初期化を行っています。
先程紹介した、Positionクラスを作っています。
画面中央に、5x5の四角を作る想定です。
def __init__(self):
    pyxel.init(160, 120, caption="test")

    # オブジェクトの初期化
    x = pyxel.width / 2
    y = pyxel.height / 2
    self.position = Position(x, y, 5, 5)

    # アプリの開始
    pyxel.run(self.update, self.draw) # update, drawのコールバックを設定
update()でキー操作
update()はキー操作について書かれています。
# 周期ごとに実行する処理
def update(self):
    if pyxel.btnp(pyxel.KEY_SPACE):
        pass # charactor jumping
    # elif pyxel.btnp(pyxel.KEY_A):
    elif pyxel.btnp(pyxel.KEY_A, 1, 1):
        self.position.moveLeft(1)
    elif pyxel.btnp(pyxel.KEY_D, 1, 1):
        self.position.moveRight(1)
    elif pyxel.btnp(pyxel.KEY_W, 1, 1):
        self.position.moveUp(1)
    elif pyxel.btnp(pyxel.KEY_S, 1, 1):
        self.position.moveDown(1)
    elif pyxel.btnp(pyxel.KEY_Q):
        pyxel.quit()
ここで使っていますbtnp()は
btnp(key, [hold], [period]) そのフレームにkey が押されたらTrue 、押されなければFalse を返す。hold とperiod を指定すると、hold フレーム 以上ボタンを押し続けた際にperiod フレーム間隔でTrue が返る
今回はキーボード操作のゲームでよくある「WASD」で上下左右を設定しています。
キーが押されたら、PositionクラスのmoveXXX()で座標を1px移動しています。
draw()で描画
draw()でやっている描画は、おおまかに3つ。
- cls()で画面クリア
- text()でデバッグ表示
- rect()で四角を表示←今回の目標
# 描画 ここに処理系は置かないものと思われる
def draw(self):
    pyxel.cls(0) # 画面をcolでクリア
    pyxel.text(pyxel.width - 30, 0, str(pyxel.frame_count), 3)
    pyxel.text(0, pyxel.height - 5, self.position.status(), 3)

    pyxel.rect(self.position.x, self.position.y, self.position.w, self.position.h, 11)
前回の記事でも記載しましたが、cls()は基本的には必ず入れる必要があります。
https://www.lisz-works.com/entry/pyxel-startup#cls
update()で座標の変更を管理してくれているので、draw()では四角を描画するだけでOK!
デバッグテキストは、
- 右上にフレームカウント
- 左下に四角の座標情報
を表示しています。
画面自体のpx数がそれほど多くないので、表示しすぎには気をつけないとかもしれません。
四角の描画について
四角の描画はrect()で行います。
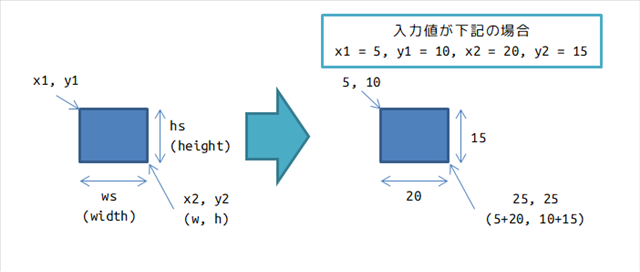
pyxel.rect(x1, y1, x2, y2, color)
こんなイメージです。

左上の座標と、右下の座標を指定してあげることで、四角を描画してもらいます。
あとがき
ということで「Pyxelで四角をキーボードで動かす」についてでした!
サンプルやドキュメントを見れば、ひとまずサクッと作れますね……スバラシイ。
キー操作ができれば、あとは
- 当たり判定
- 敵の管理
- ルールと実装
のような、ゲームに必要な要素が作れれば、何かしら作れそうですね!
なにか簡単なものを作ってみたいと思っておりますー